Pigeon pose yoga offers a thoughtful way to explore the hips, improve mobility, and build body awareness. This powerful posture can invite a mindful release, but it should never become a test of flexibility. With patience, steady breathing, and support, you can discover what feels nourishing for your body today.
Pigeon Pose may feel intense without being painful. The goal is responsive sensation—not forcing, collapsing, or pushing past your limits. As you settle into the shape, your breath can help you notice where you are holding tension and where you can soften safely.
This practice is part of a broader approach to holistic well-being. Mindful movement, breath awareness, and self-compassion can help you create a steadier relationship with your body, both on and off the mat. Whether you are new to yoga or have practiced for years, listening inward remains an essential skill.
In this guide, you’ll learn how Pigeon Pose may support hip mobility, posture, and mindful release. We’ll also explore variations for different bodies, practical alignment cues, and modifications using props or alternative shapes. Along the way, we’ll discuss common mistakes and safety precautions, so you can practice with confidence and care.
There is no single “perfect” version of Pigeon Pose. Your most supportive expression may change from day to day, and Joyous Yoga is here to encourage that personal journey. Approach each practice with curiosity, honoring your unique path toward balance, comfort, and connection.
What Is Pigeon Pose?
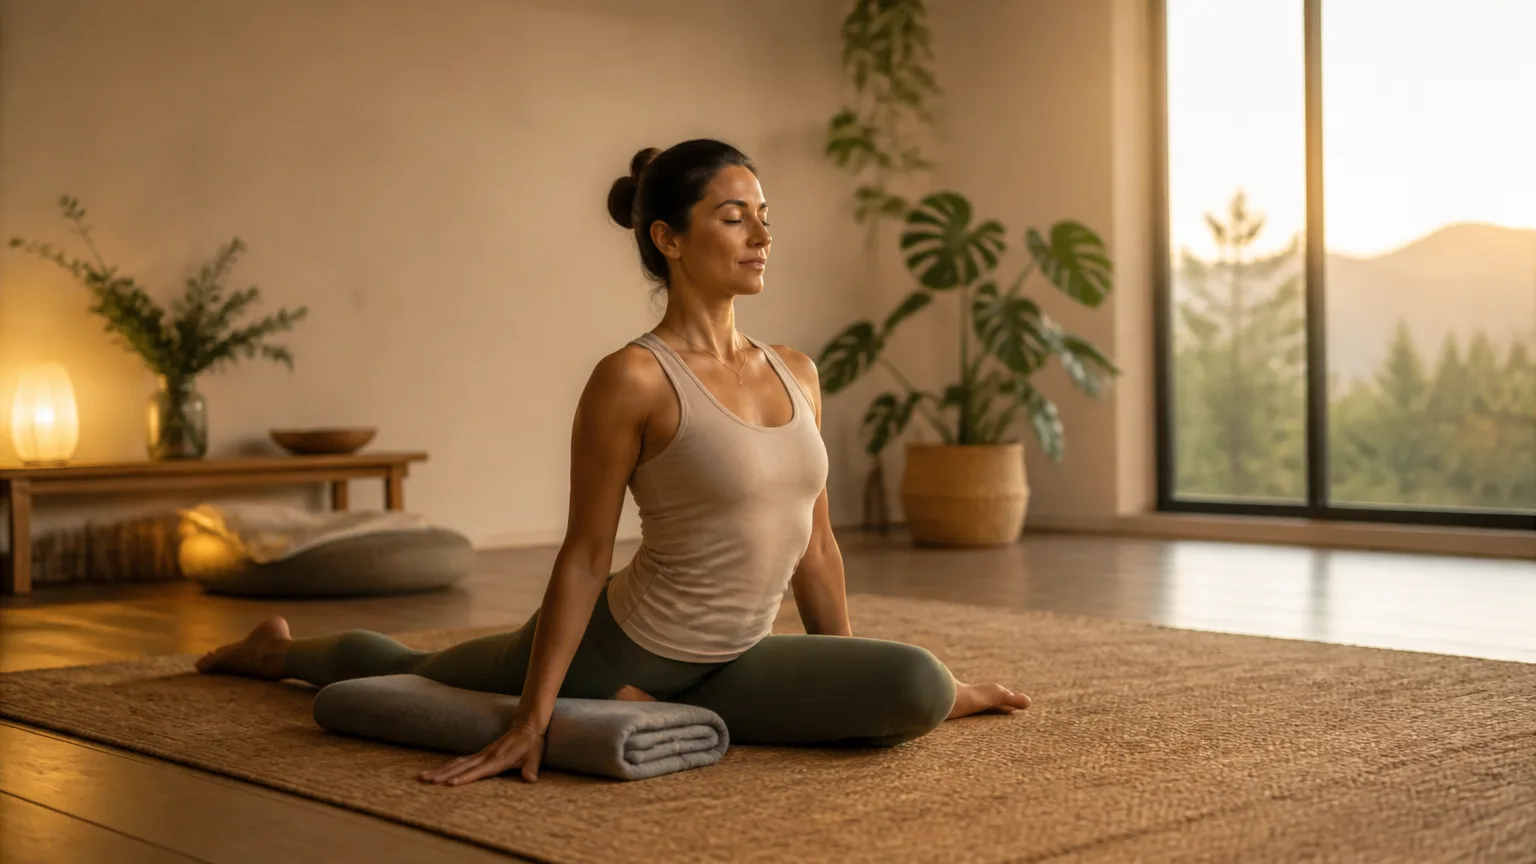
Pigeon Pose, commonly known by its Sanskrit name Eka Pada Rajakapotasana, is a seated hip-opening posture. In its familiar shape, one leg folds forward while the other extends behind you. Your torso may remain upright, or you may fold gently over the front leg.
This posture combines hip flexion and external rotation in the front leg with hip extension in the back leg. Together, these actions create a deep and varied experience for the hips, glutes, outer hip tissues, quadriceps, and hip flexors. Because the position asks several areas to respond at once, pigeon pose yoga can feel different from one side to the other.
Your experience also depends on your bone structure, joint shape, flexibility, and previous activities. Some bodies naturally allow the front shin to move closer to parallel with the mat. Others feel more comfortable keeping the heel nearer to the pelvis. Neither version is more advanced or more correct.
A supportive practice focuses on steady breathing and ease rather than forcing a particular shape. You might notice muscular stretching around the outer hip, glutes, quadriceps, or front of the back leg. You may also feel compression where tissues meet, especially in the front hip or folded leg.
Stretching should feel gradual and manageable. Sharp pain, pinching deep in the joint, or sensations that travel along the leg may signal that you need to adjust. These feelings can relate to joint compression or nerve irritation, rather than a beneficial muscle stretch.
Use props or choose a gentler variation when needed. A folded blanket beneath the front hip can reduce strain and help your pelvis feel more supported. As with every posture, your most nourishing version is the one that respects your anatomy today.
Pigeon Pose Benefits for Mobility, Strength, and Mindful Practice
When practiced with patience, pigeon pose yoga can support more comfortable movement through the hips and pelvis. The posture gently explores external hip rotation while encouraging awareness of how the front and back legs relate. Over time, consistent practice may help improve hip mobility without requiring you to force a deep shape.
The front-leg position can create a lengthening sensation around the outer hip and glutes. The back leg may also invite a stretch through the hip flexors, especially when the pelvis stays steady. These areas can feel tight after sitting, running, cycling, or other repetitive activities, so a supported version may fit well into a recovery-focused routine.
Pigeon Pose may also help release tension held in the glutes. That release should feel gradual and spacious, not sharp or overwhelming. If the sensation becomes intense, ease out of the pose, add support, or choose a gentler variation that allows your muscles to soften.
The posture can strengthen postural awareness, even when it is not a traditional strength-building exercise. Maintaining a balanced pelvis and a long spine asks you to notice how your body organizes itself. You may discover that one side feels more open, stable, or comfortable than the other.
Approach these differences as useful information rather than problems to correct. Spend a little more time setting up the less familiar side, while avoiding the urge to make both sides look identical. This mindful attention can support more even movement patterns in yoga and everyday activities.
Breath can transform Pigeon Pose from a simple mobility exercise into a mindful practice. Try inhaling slowly through your nose and lengthening your spine. Then exhale without collapsing, allowing your shoulders, jaw, and glutes to soften. A longer hold may help you observe changing sensations, provided your alignment remains comfortable.
You might explore these benefits by:
- Holding a supported variation for five to eight slow breaths.
- Noticing whether your pelvis shifts toward one side.
- Comparing both sides without judging either one.
- Moving gently afterward to reconnect with your full range of motion.
The benefits of Pigeon Pose depend on consistent, well-aligned practice. A deeper shape is not automatically more effective, and forcing the hips can create unnecessary strain. Use props, adjust your position, and let your breath guide the intensity so the posture supports mobility, recovery, and connection.
How to Do Pigeon Pose Step by Step
Begin in tabletop with your hands beneath your shoulders and your knees beneath your hips. You can also start in Downward-Facing Dog, then inhale and lift one leg behind you. Move slowly, giving yourself time to notice how your hips and lower back feel.
From tabletop or Downward-Facing Dog, bring your right knee toward your right wrist. Place the knee slightly behind the wrist if that feels more comfortable. Let your right foot move toward your left hand, choosing an angle that allows your hip to relax.
Your front foot does not need to be parallel to the front edge of the mat. The safest position depends on your hip structure, mobility, and comfort. Keep the foot closer to your pelvis if a wider angle creates pressure in the knee.
Extend your left leg behind you, reaching through the toes or resting the top of the foot on the mat. Square your hips toward the front of the room as much as possible. Notice whether your right hip lifts or your pelvis collapses toward one side.
If your pelvis feels uneven, place a folded blanket beneath your right hip for support. A yoga bolster can also provide comfortable support beneath your torso or hips. Your goal is not perfect symmetry but a steady foundation without strain.
Walk your hands beside your hips and inhale as you lengthen your spine. You may remain upright, keeping your chest open and your shoulders relaxed. This position often offers a gentle, focused introduction to pigeon pose yoga.
For more support, place your hands on blocks beside your hips. Blocks can reduce the need to reach the floor and help you maintain space through your spine. If your front hip feels compressed, stay elevated rather than forcing your body lower.
If your hips and spine remain supported, slowly fold forward over your front leg. Lower onto your forearms, a bolster, or stacked blankets. Keep breathing smoothly, and stop before your back rounds heavily or your knee feels uncomfortable.
Stay for several steady breaths, perhaps five to eight, allowing each exhale to soften unnecessary effort. Observe sensations without trying to force a deeper stretch. If you feel sharp pain, tingling, or pressure in your knee, return to an upright position or come out of the pose.
To exit, press gently into your hands and lift your torso. Tuck your back toes, move through tabletop, or shift back into Downward-Facing Dog. Pause for a breath before repeating the sequence on the left side, giving both hips equal patience and care.
Safe Alignment Tips for Protecting the Knees, Hips, and Lower Back
Pigeon Pose can feel deeply opening, but comfort should always guide the shape. In pigeon pose yoga, alignment is not about creating a perfect 90-degree angle with the front knee. Every body has different hip structure, muscle length, and range of motion.
Begin from a stable position with your front shin angled comfortably forward. The front knee should generally track in the same direction as the front toes, but it does not need to form a fixed angle. If your knee feels strained, move your front foot closer to your pelvis. A narrower shape often reduces pressure while still allowing the outer hip to release.
Avoid pulling the front foot farther forward simply to make the shin look parallel with the front edge of your mat. This can place excessive stress on the knee when the hip does not yet have enough mobility. Instead, let the front knee bend naturally and keep the movement within a range that feels steady and supported.
Your pelvis also needs attention. Many practitioners shift heavily toward the front-leg side, causing one hip to drop and the spine to rotate. Place a folded blanket, bolster, or yoga block beneath the front hip to level the pelvis. The prop should fill the space gently, rather than forcing your body into symmetry.
Keep your back leg extended behind you, with the kneecap and top of the foot facing down as comfortably as possible. Avoid rolling outward through the back hip or letting the leg drift to one side. Lengthen through the leg without gripping the glutes, and keep your pelvis facing forward as much as your anatomy allows.
Before folding, establish a long spine. Press lightly through your fingertips or hands, broaden across your collarbones, and draw your navel gently inward. If your hips remain uneven, folding deeply can round or collapse the lower back. Stay upright, use more props, or rest your forearms on support instead of reaching the floor.
Let your breath help you recognize useful intensity. A gradual stretch through the outer hip or back thigh may be appropriate, but sharpness is not. Back out immediately if you notice:
- Sharp pain in the front knee
- Pinching or catching in the hip
- Numbness or tingling
- Persistent pain that does not ease after adjusting
To explore other ways of building body awareness and strength, consider this step-by-step yoga pose guidance. As with any posture, move slowly and stay curious about your individual response.
If you have a recent injury, joint condition, pregnancy-related concern, or significant mobility limitation, seek individualized instruction from a qualified yoga professional. A skilled teacher can help you adapt the pose, choose supportive props, and find a variation that honors your body today.
Pigeon Pose Variations for Different Needs and Experience Levels
Upright Pigeon Pose is a supportive starting point for exploring pigeon pose yoga. From a tabletop position, bring one shin forward and keep your torso lifted. Place your hands on the floor or blocks, and focus on steady breathing rather than forcing your hips toward the mat.
If your front hip feels unsupported, slide a bolster or folded blanket beneath that side. This supported version can reduce strain and help your pelvis remain more level. It is especially helpful when one hip sits higher, your flexibility varies between sides, or you are practicing after a demanding workout.
You can also soften the intensity with a gentle forward fold. Keep your spine long as you walk your hands forward, then rest your forehead on stacked hands, a block, or a bolster. Choose this option when your body feels ready to settle, but return to an upright position if your breath becomes restricted or your front knee feels pressured.
Reclined Figure Four offers an accessible alternative to traditional Pigeon Pose. Lie on your back, cross one ankle over the opposite thigh, and draw your legs toward your chest. This variation can ease pressure on the knees and pelvis while still creating a meaningful stretch through the outer hip and glutes.
For additional stability, practice a chair-supported version. Sit toward the edge of a sturdy chair, place one ankle over the opposite thigh, and keep both feet or the supporting foot grounded. A wall can also provide support while standing, helping you control balance as you explore a figure-four shape without placing as much demand on the floor-based joints.
More experienced practitioners may explore variations such as Mermaid or King Pigeon. These shapes add greater demands on the shoulders, hips, spine, and balance. Approach them only when your foundational Pigeon Pose feels stable, and consider guidance from a qualified teacher before adding binds or deep backbends.
Let sensation, breath, and stability guide your choice. A variation that looks less dramatic may offer greater benefit because it allows your body to relax and respond. In pigeon pose yoga, progress means building awareness and comfort, not chasing the deepest shape.
Common Mistakes and How to Make Pigeon Pose More Effective
One common mistake in pigeon pose yoga is forcing the front shin to run parallel with the top of the mat. This shape is not right for every hip or knee. Pressing the foot farther forward can twist the knee while the hips remain restricted, creating unnecessary stress. Instead, draw the front heel closer to your pelvis and angle the shin comfortably.
Another mistake is collapsing into the pose as though gravity must create the stretch. Passive sinking can strain the front knee, hips, or lower back. Keep active support through your hands, gently engage your core, lengthen your back leg, and ground both sides of your pelvis as evenly as possible. A folded blanket beneath the front hip can help you stay lifted and supported.
Notice your breath, too. Holding it often signals that you are working beyond a useful edge. Soften your jaw, breathe slowly, and reduce the intensity if your breath becomes tight or uneven. Sharp, pinching, or electric sensations are reasons to come out and reassess.
Avoid treating differences between sides as a problem to overpower. One hip may need more time, so you might hold the pose for several breaths on one side and fewer on the other. This is thoughtful practice, not failure. Let asymmetry offer information rather than judgment.
You can also make Pigeon Pose more effective by preparing your body first. Try gentle lunges, Cat-Cow, glute activation, and controlled hip circles to warm the hips and spine. These movements can help you enter the pose with greater awareness and less resistance.
Finally, leave the pose calmly. Press into your hands, lift your torso, and move through tabletop before repeating the stretch. Follow with a neutralizing movement, such as a gentle windshield-wiper motion or Child’s Pose, rather than immediately repeating an intense hip opener.
How to Add Pigeon Pose to a Balanced Yoga Sequence
Pigeon Pose fits best after you have warmed the hips, legs, and lower back. This preparation is especially helpful after sitting or before moving into a deeper hip-opening sequence. Begin with several rounds of Cat-Cow, pelvic circles, Low Lunge, and gentle lunges to build heat gradually.
A short pigeon pose yoga sequence might follow this progression:
- Move through three to five minutes of active warm-ups, such as Sun Salutations, lunges, or tabletop hip circles.
- Practice a supported Pigeon Pose on one side, using a folded blanket beneath the front hip if needed.
- Hold for a few breaths, then gradually extend the stay to one or several minutes when the variation feels steady and comfortable.
- Press into your hands to exit, return to tabletop, and neutralize with gentle windshield-wiper movements or Child’s Pose.
- Repeat on the second side, then finish with a comfortable seated or lying relaxation pose.
Your hold time should reflect your experience, the variation, and the quality of sensation. Choose a shorter hold when practicing an active or more intense version. Longer, supported holds may feel appropriate when your breath remains smooth and your body can soften without strain.
Throughout the sequence, treat mindfulness as part of the posture. Keep your breathing steady, relax your facial muscles, and observe sensations instead of measuring performance. A stable mat, helpful props, and an uncluttered practice area can also build confidence and make consistency easier.
After both sides, rest in Savasana or another relaxing position for several minutes. Allow your hips and legs to settle while you notice the effects of your practice with patience and curiosity.
Frequently Asked Questions About Pigeon Pose Yoga
Should Pigeon Pose hurt? A mild, steady stretch through the outer hip or glutes can be normal. Sharp, pinching, electrical, or joint-focused pain is a warning to change position or stop. Ease out slowly, add support, or choose another pose rather than pushing through discomfort.
Is Pigeon Pose suitable for beginners? Yes, when practiced with patience and support. Begin with an upright or supported version, using a folded blanket beneath the front hip if helpful. If alignment feels difficult to assess, practice with a qualified teacher who can offer personalized guidance.
How long should I hold Pigeon Pose? Start with several comfortable breaths on each side. Gradually increase the time only when your breathing remains smooth and your alignment feels steady. A shorter, mindful hold can be more beneficial than a long hold filled with tension.
Why is one side much tighter than the other? Differences between sides are common. Your daily habits, movement patterns, past injuries, and natural anatomy can all contribute to asymmetry. Use extra support on the tighter side, but avoid forcing both hips to look or feel identical.
What can I do instead of Pigeon Pose? Reclined Figure Four offers a similar focus while reducing pressure on the knees and hips. You might also try a supported hip stretch with your back or pelvis resting on props. Other gentle options can create space around the hips without requiring the same range of motion.
Can I practice Pigeon Pose every day? You may include a gentle variation regularly if your body responds well. Allow soreness or irritation to settle before repeating a deeper practice. Pay attention to how your hips, knees, and lower back feel afterward, and adjust your routine accordingly.
With pigeon pose yoga, safe progress comes from listening closely rather than chasing intensity. When pain, limited mobility, or uncertainty continues, pause and seek guidance from a qualified yoga professional or healthcare provider.
Practice Pigeon Pose With Patience and Self-Awareness
Pigeon Pose can support hip mobility, mindful movement, and a deeper sense of connection with your body. Its benefits grow when you practice with steady breathing and thoughtful alignment, rather than trying to reach the deepest shape.
Support your pelvis with a folded blanket or bolster if it shifts or leaves one side hanging. Keep the front knee comfortable, and avoid forcing it into a sharper angle. Useful sensation may include gentle stretching or opening, but sharp, pinching, or persistent pain is a clear reason to back off.
Choose the variation that lets you breathe smoothly and maintain awareness. That might mean staying upright, folding only slightly, or practicing Reclined Pigeon instead. A less advanced-looking position can be more beneficial when it helps your body relax and respond.
Move in and out of the posture slowly, giving both sides equal care. Afterward, notice how your hips, knees, and lower back feel. You can also create a calm setting with yoga music for a mindful practice, allowing sound to support your focus without replacing body awareness.
If discomfort continues, or you have an injury, joint condition, pregnancy-related concern, or mobility limitation, seek guidance from a qualified professional. Sustainable pigeon pose yoga is not a flexibility test. Include it thoughtfully in a balanced practice, and let breath, comfort, and self-awareness guide your unique path.